Showing posts with label Food and Cooking. Show all posts

Wednesday, October 8, 2014

Frozen Peppers

I never did get around to sharing pictures of the other pepper plants with you this summer, I might have to do that this fall/winter. For now, imagine I have shared them with you! Our peppers officially left the greenhouse last weekend. Matt pulled out the last pimientos de padron and pepperoncinis and we fried them up and had them as an appetizer to our supper. I can't wait for next summer, when we can have them again! He also pulled out a few more bell peppers and the last of the hot peppers. He chopped them all up and we tossed them in the freezer with the other two gallon freezer bags filled with vacuum sealed peppers.

Bell Peppers, hot peppers, and banana peppers from August 16th 2014

Tonight, we will be using our vacuum sealed peppers for supper, and we're so excited to be able to use the bounty of our harvest even though the peppers are dead and gone. I know I'll still never grow enough peas to make Grandpa Arneson happy, but I sure was able to grow enough peppers :) (check back with me in March...hopefully they do last all winter!)

How did your canning go this year? Are you still working your way thru, or are you stocked and looking forward to pumpkin season?

Wednesday, July 30, 2014

A Peck of Pickled Peppers

Since I have so many peppers this year (I guess I was expecting the same results as the last three years...and may have gone a little overboard!) Matt and I have been racking our brains to come up with uses for all the different varieties. We've sauteed them, put them in stir fries, made stuffed bell peppers, and tossed them in our scrambled eggs in the mornings...and we still have more peppers than we know what to do with. Several sources suggested pickling, which I resisted, since I don't really care for pickled anything, but when Matt got involved there was no turning back. (He loves a pickled food, so when he insisted we pickle at least some of the peppers, I couldn't say no.) It was so quick and easy that we're thinking we may pickle the lot of them! Plus, I hear you can use pickled peppers for pretty much anything you would use fresh peppers for, so I guess we'll be trying that theory out this year.

We started with the hot bananas, the chinese five colors, and the pepperoncinis.

Chinese Five Color Peppers Ready to Pickle
Hot Banana Peppers

Pepperoncini Peppers

We used a simple recipe we found online, and added a garlic clove to a few of the jars. We either didn't stuff the jars properly, or we didn't understand the recipe, but we ended up making three times the amount of brine requested in the recipe and the jars are still a little low on juice. The Hot Bananas were sliced for ease of use, while the Pepperoncinis and the Chinese Five Colors were left whole (with an incision in their sides so the juice would seep in and do its job properly.) This might have also led to the packing problem, it was very difficult to fill the jars with whole peppers! Any hints or suggestions left in the comments will be greatly appreciated, as we are planning to do the jalapenos in the coming week!

Pickled Peppers in Half Pint Jars - From Left to Right, Chinese Five Colors, Banana Peppers, Pepperoncinis

Recipe:
2 lb hot peppers
2 tbsp canning/pickling salt
1 cup white vinegar
1 cup water

Combine water, vinegar, and salt to make the brine. Bring to a boil, then pour over peppers packed into jars, leave 1/2" headspace in the jars. Process in hot water bath 10 minutes. Let stand 2-3 weeks.

We found other recipes suggesting a 4-6 week time frame, so we are going to wait a full month before we open one of our jars. We also live in a high altitude area, so we did our water bath for a bit longer than ten minutes. We can't wait to see how they turn out!!

Thursday, July 10, 2014

Peppers Peppers Everywhere!

I know I haven't gone into detail on the greenhouse yet, and believe me...I will. Sooner rather than later hopefully. But today I have to tell you about at least one of my greenhouse successes: Pimiento de Padron peppers. Matt's mom sent a ton of seeds, and this was one of them. The package suggested picking the peppers when they were the size of an olive, then sauteeing them in olive oil. The plant was covered in peppers, so we picked them - about nine fully ripe peppers in all, then double checked the recipe online, and made some super yummy peppers to share on Tuesday evening. They were sensational! So yummy, I keep checking the greenhouse to see if more have starting growing on the plant yet. We have plans to grow several padrons next summer!

Actually a ChiChi Meca Pepper, not a Pimiento de Padron

Of course I didn't get a picture, because I was too excited to dig in! But they looked pretty close to the picture on the Martha Stewart recipe we used. It was super cool to watch them - they blistered up in the pan, then deflated on the paper towel covered plate. She's right - some were sweet and a few were spicy. But I think the two spicy ones were the biggest of the bunch, so it might not be that difficult to deduce which ones will be spicy. We'll definitely test this out again and let you know :)

Saturday, March 29, 2014

Etsy Weekends - Tea and Honey

I love tea and honey, and Etsy is a great place to find both!

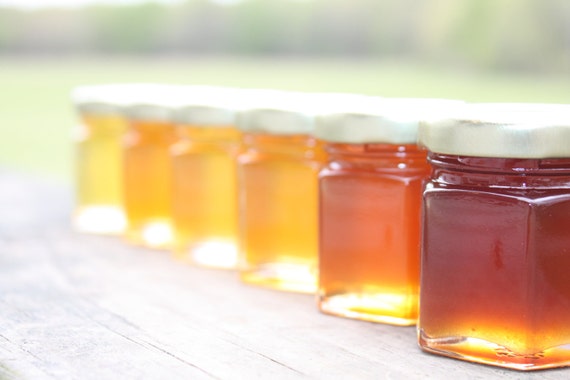
A Honey Tasting  --  One sampler of  6 Varieties of Honey's from the Hive Ohio Proud Christmas Favorite
Honey Sampler from Kline Honey Bee Farm
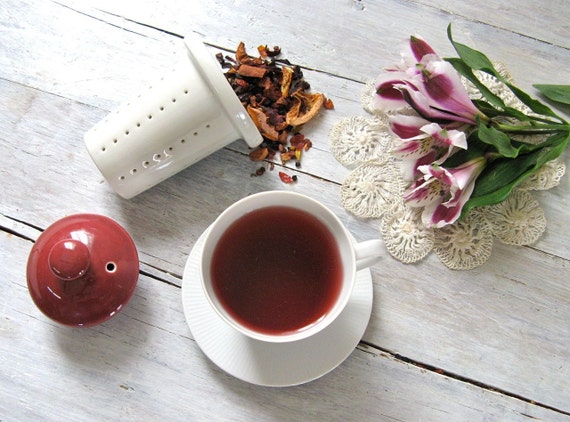
Mulled Wine Fruit Blend Herbal Tea | ArtfulTea Luxury Loose Leaf Blend | Festive Winter Drink | Caffeine Free
 Fruit Tea from Artful Tea

Swing through next weekend to see what else we've found!

Sunday, March 9, 2014

Etsy Weekends - Gourmet Food

Last time I shared food with you I said that I love looking at the gourmet food, although I'm not sure that I would even like it! Here are a few of those gourmet items I keep eyeing....   
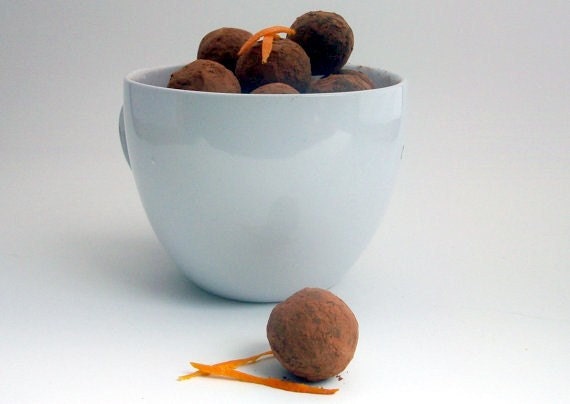
Dark Chocolate Orange Truffles Organic & All Natural (16 count)
Dark Chocolate Orange Truffles from Esther Aguirre
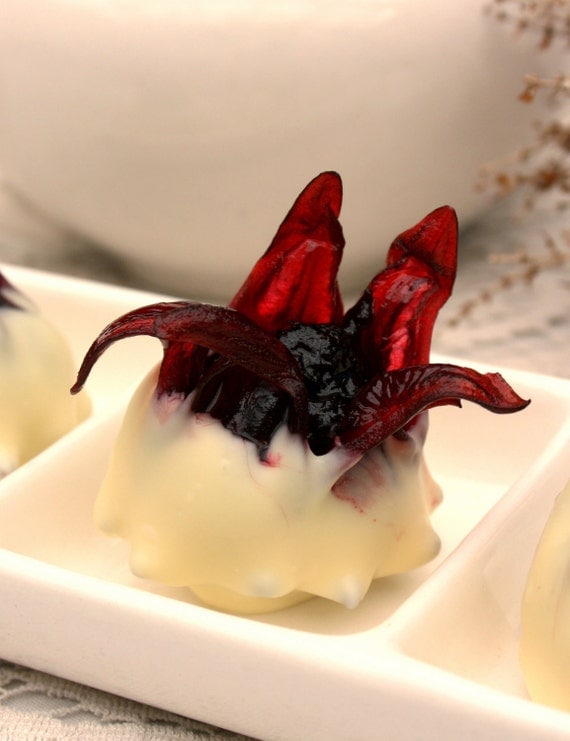
Hibiscus White Chocolates from CrickleWood Chocolate
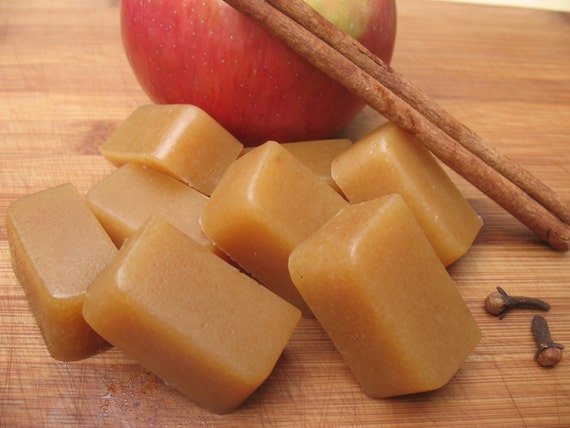
Vegan Organic Mulled Apple Cider Caramels -- LAST ONES
Apple Cider Caramels from Feed Your Face


Next week we'll have even more Etsy goodies to share, so stop on by!

Thursday, February 27, 2014

32nd International Street Food Bazaar

Every year MSU hosts the International Street Food Bazaar in Bozeman, MT. It is held on campus, and this year it seemed like they had record numbers of people attending. Last year was my first visit - I went as part of an assignment for one of my classes. This year Matt was able to go along with me! (And I was there to enjoy the food, not to do a class assignment!) I wanted to get pictures of the food we ate, and of the students making the food...but I got a little too excited about the food...and ended up without any pictures of the actual event. Whoops! Maybe next year :) I did however, bring home the brochure...and took pictures of that!


We enjoyed ourselves immensely. We went with $40, and came home with $1. We went with empty bellies, and came home overstuffed! It was all in all, a fantastic event! We were able to eat from 11 different countries, from Africa to China to Peru. We tried two different curries, (and could have tried more!) had four different types of rice, and four different beverages. We had chicken and beef and fried plantains!

I think my favorite booth was Saudi Arabia's curry, although I didn't like the veggies - okra and green beans. I also loved the sticky rice from Peru's booth, that came with their version of stir fried beef, complete with onions and tomato chunks. I also loved Burma's pumpkin ginger cupcakes, and Malaysia's Pink Lady beverage. Matt thoroughly enjoyed Indonesia's Chicken Sate with Chili and Garlic Peanut Sauce, and India's spicy Samosa (like a pasty!) and curried chicken. He also cleaned the plate filled at the African Society's booth - fried plantains, rice, and spicy chicken sauce. We were glad we also grabbed Aruk from Iraq, because as a biscuit-y pastry filled with meat, it was not spicy and helped cool our mouths between bites of seriously spicy curry. The American Indian Council's fry bread with honey and powdered sugar really capped the night off for us, in a doughy sweet treat.

We can't wait to go back again next year!! What do you think you would have tried?


Saturday, February 15, 2014

Etsy Weekends - Comfort Food

I love food, and while I may not be a foodie per se, I still love looking at all the weirdo gourmet food on Etsy. Of course, I'm still drawn to the relatively normal fares for sale! Here are a few comfort foods I love on Etsy!
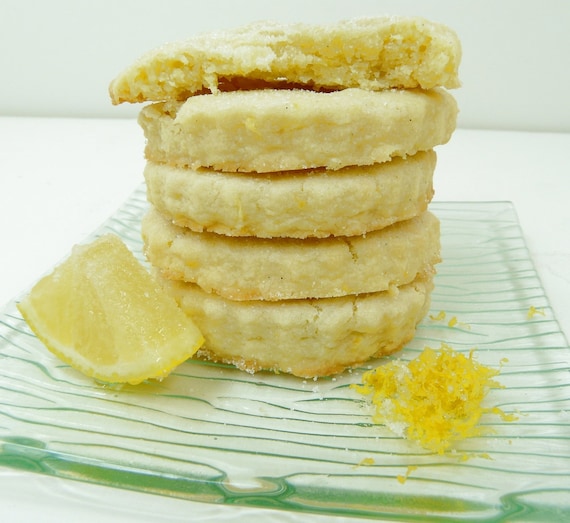
Lemon Shortbread - Just perfect.
Lemon Shortbread from The Groovy Baker
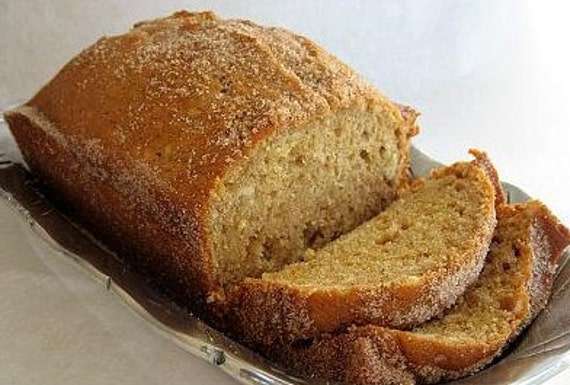
homemade Amish Friendship bread
 Amish Friendship Bread from Playful Wears Etc.
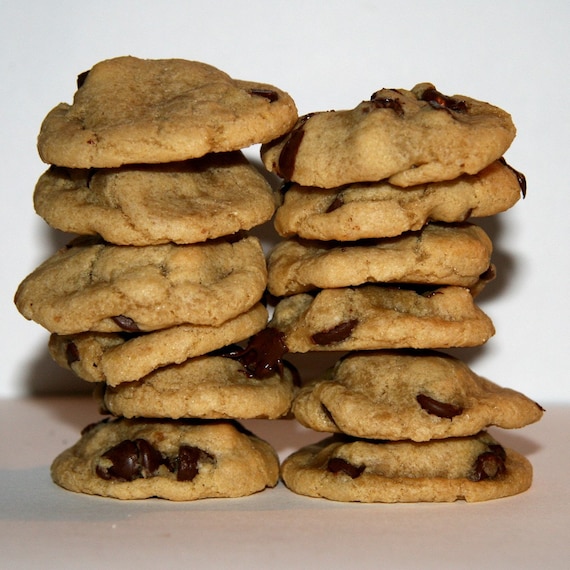
Bite Size Chocolate Chip Cookies
 Bite Size Cookies from Clear Pink

Come back next weekend to see what else we have up our sleeves!

Wednesday, January 22, 2014

In the Kitchen with Pam: Garden Roasted Tomato Style

Last time when we chatted with Pam in the kitchen she was sharing her time tested salsa recipe. This week she's willing to share another recipe, this one new to our kitchen this season!
A friend gave me a great recipe for roasted tomatoes.  She uses a type of tomato that is similar to a Roma but bigger.  You slice the tomato in half and take out a lot of the seeds.  Then sprinkle them with garlic powder and parmasean cheese.  I also added some dry Italian Salad Dressing mix that I bought from Penzey's.  You roast them at 450 degrees for about 45 minutes to an hour.  They are great. You can change the seasonings that you put on top of the tomatoes depending on what you think you'll use them for.   I'm not going to show a picture of them because they are all smooshed in freezer bags in my freezer!  I'm planning on using the roasted tomatoes on pasta this winter or on a great pizza recipe I watched on Cooks Country called "Grandma's Pizza".  You make the crust, put on the mozzarella cheese and parmesan and then sprinkle the tomatoes on top.   
How great is it to use those summer veggies all winter long? How do you use your summer veggies in the winter?
Grandma Pizza

Thursday, January 9, 2014

In the Kitchen with Pam: Garden Tomato Sauce Style

We're joining Pam in the kitchen again this week where she shares insight into making tomato juice from your Garden veggies...that you can dream about all winter and utilize next harvest season!!

Since I had more tomatoes than peppers this year I also made a lot of tomato juice.  I cut up the tomatoes and then cooked them for about an hour and then ran them thru a sieve to remove the seeds.  I then put the juice back on the stove and simmer it until it gets as thick as I want!  The longer you cook the thicker your juice will get.  Mine is normally somewhere between juice and tomato sauce.  I use it in vegetable beef soup and chili.  If I have a lot of peppers I add some peppers to the cut up tomatoes.

Have you ever tried making tomato sauce? What were your experiences? Too sweet...too bland...or just right?

2013 Stupice Tomato Harvest

Sunday, December 15, 2013

Etsy Weekends - Cooking with Wood

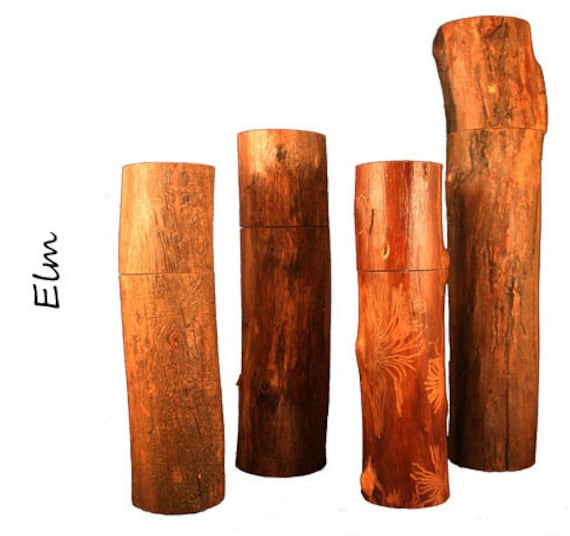
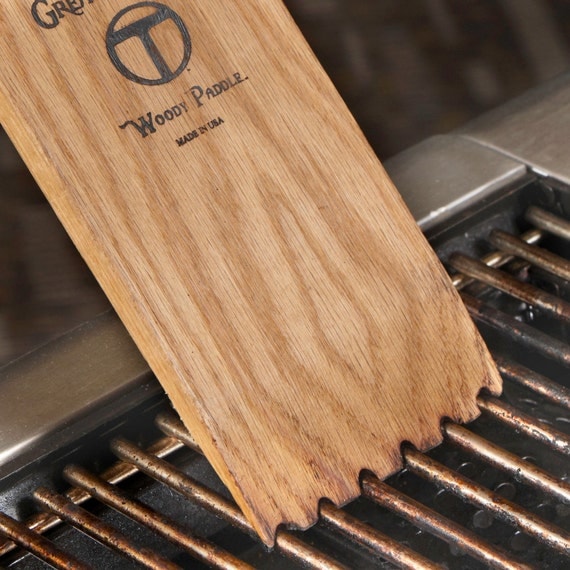
Sorry for the long break there, between Thanksgiving, dead week and finals week at school, things got a bit hairy around here! We've been busy out doing, in knitting, and looking at all the wonderful things Etsy has to offer! This week I want to share two new kitchen gadgets I came across...and want very badly to own! Hope to see you next week when we share the other goodies we have found :)

Pepper Mills from Tree Branches.
Elm Pepper Mills from Cam Lavers Design
Grill Cleaner from Great Scrape

Tuesday, November 5, 2013

Tuesday Tip - Eating Healthy

So we all know that you need to eat a rainbow right? Well, today Pam is going to talk about eating something orange!

Last week a friend gave me a huge squash. I've never done much with squash, so I was surprised to find that it is amazing! I'm going to save the seeds to grow some next year. She bought them from a company in Missouri that sells organic and historic seeds. Anyway after I cooked it the shell just peeled away from the squash. There wasn't a lot of scooping necessary just put it in big bowls and then I put some in freezer bags. I still have several regular squash to cook. I read an article a few weeks ago about how orange food is good for you and since my coworker broke my heart telling me that Cheetos don't count - I guess I'll have enough squash to last all winter!

Pam didn't do too much squash cooking when I was growing up, the veggies we ate the most of were peas, carrots, and corn. When I mentioned to Matt that Mom (Pam) had made a squash and I wanted to get the directions from her he was surprised that I didn't know how to cook them! I think I know what Matt will be cooking the next time he makes supper :)

There are a ton of great recipes out there for squash, but here is one of our favorite cooks, giving the lowdown on Butternut Squash Puree. Be sure and check out her other recipes while you are there, but if several hours go by while you sit and ogle food pictures...don't blame us!
Image Also courtesy of Pioneer Woman :)

Tuesday, October 29, 2013

In the Kitchen with Pam: Garden Salsa Style

Today we are visiting Pam in her kitchen, while I had very little tomato success in my Garden, Pam had tons of tomatoes to play with!!
 
This year I had lots of tomatoes in my garden but not as many peppers as I would have liked.  I used the peppers I did have to make salsa.
 
Here's my recipe:
10 cups of chopped tomatoes
5 cups of chopped onions
5 cups of green peppers
2 cups of hot peppers
4 chopped cloves of garlic
1 cup of vinegar
1 tablespoon of salt
 
I normally make a few batches of medium and a few of wow is this hot!  Adjust the temperature by how many peppers you put in.  I have a small food processor and I chop up the tomatoes, peppers and onions and I end up dumping everything in  a big pot and then I let it cook for at least an hour.  I put it in small jars like the kind you normally put jam in and then I do a hot water bath.  I found the recipe several years ago in a Taste of Home magazine and I've made some changes over the years.  I think the original called for cilantro and I don't like it so I don't put it in!  A word of warning when making salsa - if you wear contacts don't wear them the day you are making salsa!  Wear gloves when you chop the hot peppers! 


Tuesday, October 22, 2013

Tuesday Tip

Between work and school I haven't had time to do much of anything fun, or have any adventures, or even do any knitting! But tonight I am doing something I love to do - making my first batch of fall soup. Tonight will be just plain old Chicken Dumpling Soup. (Turns out, plain old Chicken Dumpling soup is my favorite!)

When I first learned how to make this soup I was working at a restaurant that sent home chicken with me each Sunday. I would get home from work and pull all the meat from the bones and freeze the meat for later use. I made so much soup in college that it constituted the better part of my diet, and is probably why I only gained 40 pounds eating the cookies I sold at the other job. :)

These days though, I don't work in a restaurant so I have to find my chicken from other sources. Walmart, surprisingly enough, has given me the solution in the form of cold rotisserie chicken. When I have enough time I actually boil the chicken and make my own chicken stock, tonight however, I will just pull the meat from the bones and use my Better than Bouillon to make the stock.

The tip, well technically the second tip, since my first tip was to tell you to buy Walmart rotisserie chicken for your soup needs, is regarding the dumplings. When I was a kid I remember Mom trying every method she could find for making dumplings, and they always tasted terrible! Except for the dumplings she made in the pressure cooker. Those were pretty good.

The trick to dumplings is to boil the little buggers. You need to have a rolling boil going before you start dropping them in. For the batter itself, I start with a couple of eggs, and then stir in lots of flour. You want the dumpling batter to be thick, but not super thick. I don't use exact measurements, so really it's more of a "test out your dumplings" method...everyone likes different textures...so try a few different consistencies to find the kind you like! Anyway, that's all I put in my dumplings. Flour and egg. Then get the rolling boil going and dip your spoon with the batter right into the water. After a few times you can kind of fling the dumplings in until they get stuck again, then just dip them in the water. You keep this cycle up until your dumplings have doubled in size and you've finally gotten through your dough :) Or if you have older kids, hand off the bowl to let them make dumplings for a bit. Or if you have hungry neighbor kids, tell them they can eat at your house tonight if they make the dumplings. Basically, what I'm saying here is that making dumplings isn't the most fun a girl can have in the kitchen. But they sure can be worth the effort!

So there you have it folks, rolling boil, dip the dough. Simplest way to make dumplings for all of your fall soup needs!!
This is the Immersion Blender Soup fiasco, but the dumplings were fantastic! :)

Tuesday, July 16, 2013

How to Make a Cake No One Wants to Eat.

I've made a few things from scratch over the years. Usually crisps, or pies, or Crazy Cake. But mostly, when I want a cake...I buy the boxed kind. It's just so easy! And it usually tastes good! Unfortunately, a few weeks ago I found myself craving cake...with no money...and no boxed cake already in my cupboard. The craving didn't go away, so I searched the internet to find a simple recipe that used ingredients I already had in the house. I found one too! So I made it. It wasn't great. I even took pictures to show you all. I was really proud of myself, until I ate the first piece.

I have been trying to decide if I should share it with you anyway, the pictures, the process, the recipe so you can avoid it...but I don't think I will. I've never been the kind of person to share when I fail...and I'm not the kind of person to show off something that isn't perfect. (Unless it's years later and now the failure has become funny) But I will assure you, my readers, of this: I will continue to make "from scratch" items that we as a society (or maybe just my family) have stopped making from scratch, and when they are good...I will share! :)

The frosting for the cake was about the best part. While the cake itself was dense and dry, the frosting was still somewhat drippy up to the last day. Microwaving a slice of cake prior to eating would make the frosting melt and drip down the sides...it was the only part that made the cake edible! (That and my voracity for all things cake related.) During my searching I came across this frosting recipe a lot, and have a plan for it in the future, because it tasted very similar to the frosting we used when I worked at Mrs. Fields. The very best use for that frosting: Peanut Butter Cookie Cups. Keep an eye out on here for when I make up those babies! Until then, here is the frosting recipe for you to use on anything that requires a yummy chocolate topping!


3 Cups Powdered Sugar
2/3 Cup Cocoa
1/2 Cup Butter
1 tsp Vanilla
1/3 Cup Milk

Sift the powdered sugar and cocoa together. Melt butter, and add to powdered sugar/cocoa mixture. Stir in vanilla. Slowly add milk until you get to your desired consistency. Add additional milk 1 tablespoon at a time if necessary (I didn't find it necessary, and almost wish I had used less milk!) Can be refrigerated for 2 days, or frozen for up to 3 months. Makes 2 cups, which is enough for two 8 or 9 inch round cake pans or one 9x13 (That's the size I made)

Mine came out a little lumpy, but you couldn't taste it on the cake. Probably because I remelted it every time I had a piece! :) Hopefully I'll have a better cake recipe to share soon! Until then...I guess we'll just eat things I can make from scratch...like cookies! :)


Thursday, June 20, 2013

Kitchen Lessons Learned

A few weeks back I made a Chicken Dumpling soup. My chicken wasn't falling apart the way I wanted it to, so I had a brilliant idea: use my immersion blender to chop up the meat!! This way my chicken would be smaller, the way I prefer it, it wouldn't take a ton of time to do it and the best part - no burned fingers! (My other methods are a bit barbaric...) Here's what the soup ended up looking like:


Here's what I learned. Using an immersion blender to chop up chicken will give you a slurry of chicken, and will make a small amount of chicken fill a pot of soup. It's great if you are using lots of dark meat, as the dark meat easily blends into the soup. It's also great if you don't have a ton of meat and need to make it stretch. But it's not so great if you already tossed in quite a bit of meat! It ended up being overly chicken-y and Matt complained about the lack of meat chunks. (He likes chunks of meat, I prefer smaller bits.) It was also almost a grainy consistency with all the shredded chicken. But hey, you live and you learn right? And now I know how to make my chicken stretch if I need it to!! :)

Wednesday, June 12, 2013

Rhubarb Cake

I planted rhubarb in the garden last week, and the lady who so graciously let me take a few roots of her plants also gave me fresh rhubarb to do some cooking with! I'm not a huge fan of mishy fruit pies (and let's be honest, I didn't have the ingredients or money to buy ingredients) so strawberry rhubarb pie was out of the question. I did an internet search and found a recipe for Rhubarb Cake...which I did have all the ingredients for! I didn't have high hopes, so I didn't take pictures of the whole process...but here's the end result!


I used my food processor to chop the rhubarb really small, then chopped about two stalks by hand. This gave me some bigger chunks (as seen in the picture) and smaller pieces that added flavor without adding mishy chunks or too much flavor. The bigger pieces give the cake a nice kick every few bites though, so I might do even more bigger chunks next time. Either way, it was a very nice introduction to baking with Rhubarb! :)

And of course, here's the recipe so you can all make this at home! :)
Ingredients:
1 1/2 cups raw Rhubarb cut fine
1  cup brown sugar
1/2 cup white sugar
1 egg
1/2 cup butter or margarine
1 cup applesauce
1/2 tsp. salt
1 tsp. soda
1 tsp. vanilla
2 cups flour
Procedure:

In large mixing bowl cream sugars and butter, add egg and salt. Stir in applesauce, soda, vanilla, and flour. Add rhubarb. Pour in prepared 9x13x2-inch baking pan and sprinkle with 1/4 cup white sugar and 1 tsp. cinnamon. Bake at 375-degrees for 30 to 35 minutes. The cake is very moist and needs no frosting.

This recipe came from Rhubarb Info - this website is full of Rhubarb Recipes!!!!


Thursday, May 9, 2013

Crazy Cake

As far back as I can remember my Mom has made a crazy cake for my birthday. It became a tradition that has been hard to continue in the last few years as I moved farther away from my parents. This year, the yearning was just too strong, and I had to have that decadent chocolate on chocolate cake once more. So I made it myself!

Crazy Cake is called that because you do something crazy when you make it - you stir up the ingredients IN the pan!! Crazy right? :) To  make this cake, you first start with your ingredients, then realize you don't have vinegar, panic, and run next door to ask for a tablespoon. Or, you could just gather your ingredients including vinegar because you are a smart person and would never try to make something without first checking that you have all of your ingredients.

Note the lack of Vinegar in this photo....
Then you mix together your sugar, flour, cocoa, baking soda, and salt in your square cake pan - remember this is Crazy Cake! You want to stir it really well, checking the sides and corners. Then make three indentations in the mix - one small, one not so small, and one pretty big. In these you will put your vanilla, vinegar, and oil.

Vanilla, Vinegar, Oil
Next pour your cup of water over the top of the whole mix, again stirring very well, making sure you get the corners and sides. (Mom always made this is in a glass pan so you could easily see if you missed any, but alas I do not have a glass pan...so I just had to check and double check!) Once it is well mixed you can clean up the mess you've made along the top and side of the cake pan - that is if you are like me and have gotten a little excited with your stirring and made a mess to clean up! Then it's ready to pop in your 350 degree oven for the next 40 minutes.

Yummy Cake Batter Goodness
Now you have a cake! The next part is the really super fun part of making this cake, and one of the many reasons I owe my Mother so much...(no third rate nursing home for you Ma!)  The next part of the cake is...cue ominous music...the frosting! Also known as the most difficult and easiest to screw up part of this cake! The frosting is basically fudge, and if you stop stirring too soon, it doesn't set quickly enough and you end up with gooeyness that soaks through the cake. If you wait too long to stop stirring, then it is just a piece of fudge on top of your cake. It's very difficult to find the happy medium where the frosting actually sticks to the top of the cake AND sets up nicely. My sister says she does two batches of frosting and purposefully puts the first layer on too soon so she gets that gooeyness. I suppose if you step back and look at it, it's still chocolate cake with some kind of chocolate frosting, and there's nothing wrong with that!!

So, we start with our ingredients again, and breathe a sigh of relief that we have everything this time...cause by now you really want this cake.


Then you toss in everything but the vanilla, bring to a boil, boil for two full minutes, remove from heat, add the vanilla, and start stirring. You will stir and stir until you think you can stir no more. Then if you are lucky you will hand the stirring off to someone else, say a child who has asked for this silly cake once again and loves to help stir, then you will stir more. (No, really, keep stirring. It needs to be really thick. Unless you want it runny. That's ok too.)


You stir until the frosting is getting thick, then quickly pour over the top of the cooled (by now) cake. Hopefully it will set quickly, and you have yourself a completed Crazy Cake!

I didn't stir long enough. But I still enjoyed every bite!

Now all you need is an ice cold glass of milk, a fork, and place to enjoy your sweet chocolate yumminess.

What else could you want? Knitting, a book, crazy cake and milk!

Here's the recipe in recipe form:

Crazy Cake
1 ½ C flour
1 C sugar
4 tbsp plain cocoa
1 tsp baking soda
½ tsp salt
1 tbsp vinegar
6 tbsp oil
1 tsp vanilla
1 C cold water
Frosting
2 C sugar
½ C milk
1/3 C cocoa
8 tsp butter
1 tsp vanilla

Preheat oven to 350°

In 8 or 9 inch square ungreased pan, mix flour, sugar, cocoa, soda and salt with fork. Make 3 holes in the mixture. Put vinegar in the first, oil in the second, and vanilla in the third. Pour water over the top and stir with fork until all ingredients are well mixed. Make sure all dry ingredients are moistened, check sides and corners. Bake for 40 minutes. Do not remove from pan-let cool.

Frosting: mix first four ingredients, boil for two minutes. Remove from heat. Add vanilla and beat with a wooden spoon until thick. Spread quickly over cake, as frosting will start to harden quickly. If desired, double the frosting.

Wednesday, February 23, 2011

Lentil Soup

It's time to show off my soup again! This time I made Lentil and Veggies Soup. Start off with Beef base, onion, celery, carrots, peas, green beans, corn, lentils and red chard, and this is what you get!


I love this soup, and Matt is getting used to it too :) He is generally opposed to the use of lentils as a meat replacement, but he's getting used to the idea.

Matt was sick with pneumonia for the last few weeks, so we haven't been up to much, and I haven't even had the energy to knit! Hopefully I can get a good amount of work done tonight, and it shouldn't be a problem with all this fuel on hand!


Happy Wednesday!

Wednesday, January 26, 2011

Soup and Hats

I feel a bit like Crazy Aunt Purl right now, but I'm so proud of this soup that I have to share!


It is a Turkey and Veggie soup, with as many colors as I could add! The hotel we work at gave us both a turkey for Christmas, and this is the last of the meat from the first bird. The other bird will have to wait a while before it gets eaten...fourteen pounds of turkey between two people isn't easy to eat quickly!!

Anyway, I did the Rathskeller base (a restaurant I worked at in De Pere Wisconsin, where they taught me how to make things in the kitchen, mostly tedious things they didn't want to do lol!) which is soup base, onion, celery, and carrots. Then I added in a turnip, green beans, peas, and corn. This was my first experimentation with a turnip, and it seems to have worked out well, although I must say I am excited to make mashed turnips and potatoes in the (hopefully) near future. I might also use the turnip in a thicker soup next time, maybe puree them, as the root veggies do have a tendency to take over the flavor of the soup.

I've also been busy making hats, and Zach Hoffman has been busy photographing them for me! They are all up on Etsy for your viewing (or purchasing) pleasure! Have a great day, and if you need a moment of fun, go ahead and feed the fish below!!


Monday, July 26, 2010

Norwegian Musings

Eating healthy isn't always easy, especially on a tight budget! Matt and I have tons of Ramen in the cupboard, and we've been trying to find ways to use the Ramen in a healthier way than the traditional method. A few days ago at the grocery store I found a bag of veggies called "Scandinavian Style Veggie Blend." I had to have it! Green Beans, Peas, Onions, Carrots, and Zucchini. I don't really understand why that makes it Scandinavian, but it was enough to make me giggle, and buy the veggies! Matt's idea was to grill a chicken breast then throw that in with some Oriental flavored Ramen and the Scandinavian veggies. Good idea, great way to use up Ramen in a sorta healthy way...but it was way too salty for me. Oh well, there's always next time!


While cooking the veggies however, Matt and I had a discussion about Norwegian food. He asked me if there were any real Norwegian dishes that I actually liked. (He of course was thinking about Lutefisk...and as we all know...that stuff is really nasty!) I came back with Lefse and Rosettes, only two of the greatest food inventions in the world! But, after that I came up empty. So, if you feel so inclined, let me know what some of your favorite Norwegian foods are! I know someone can come up with something good I'm forgetting!

And now for something completely different, another view of Montana to take your breath away. :)