Showing posts with label Knitting. Show all posts

Sunday, November 22, 2020

Thanksgiving is Coming!

They say time flies, and boy does it. I'm not sure what happened to the month of November, since we're almost at the end of it already. Thursday is Thanksgiving, and I'm excited to have the day with Matt. Of course, he is scheduled to have wrist surgery on Wednesday, so it'll be even more a day of rest than usual. :)

Thanksgiving 2018, with the Hoffmans


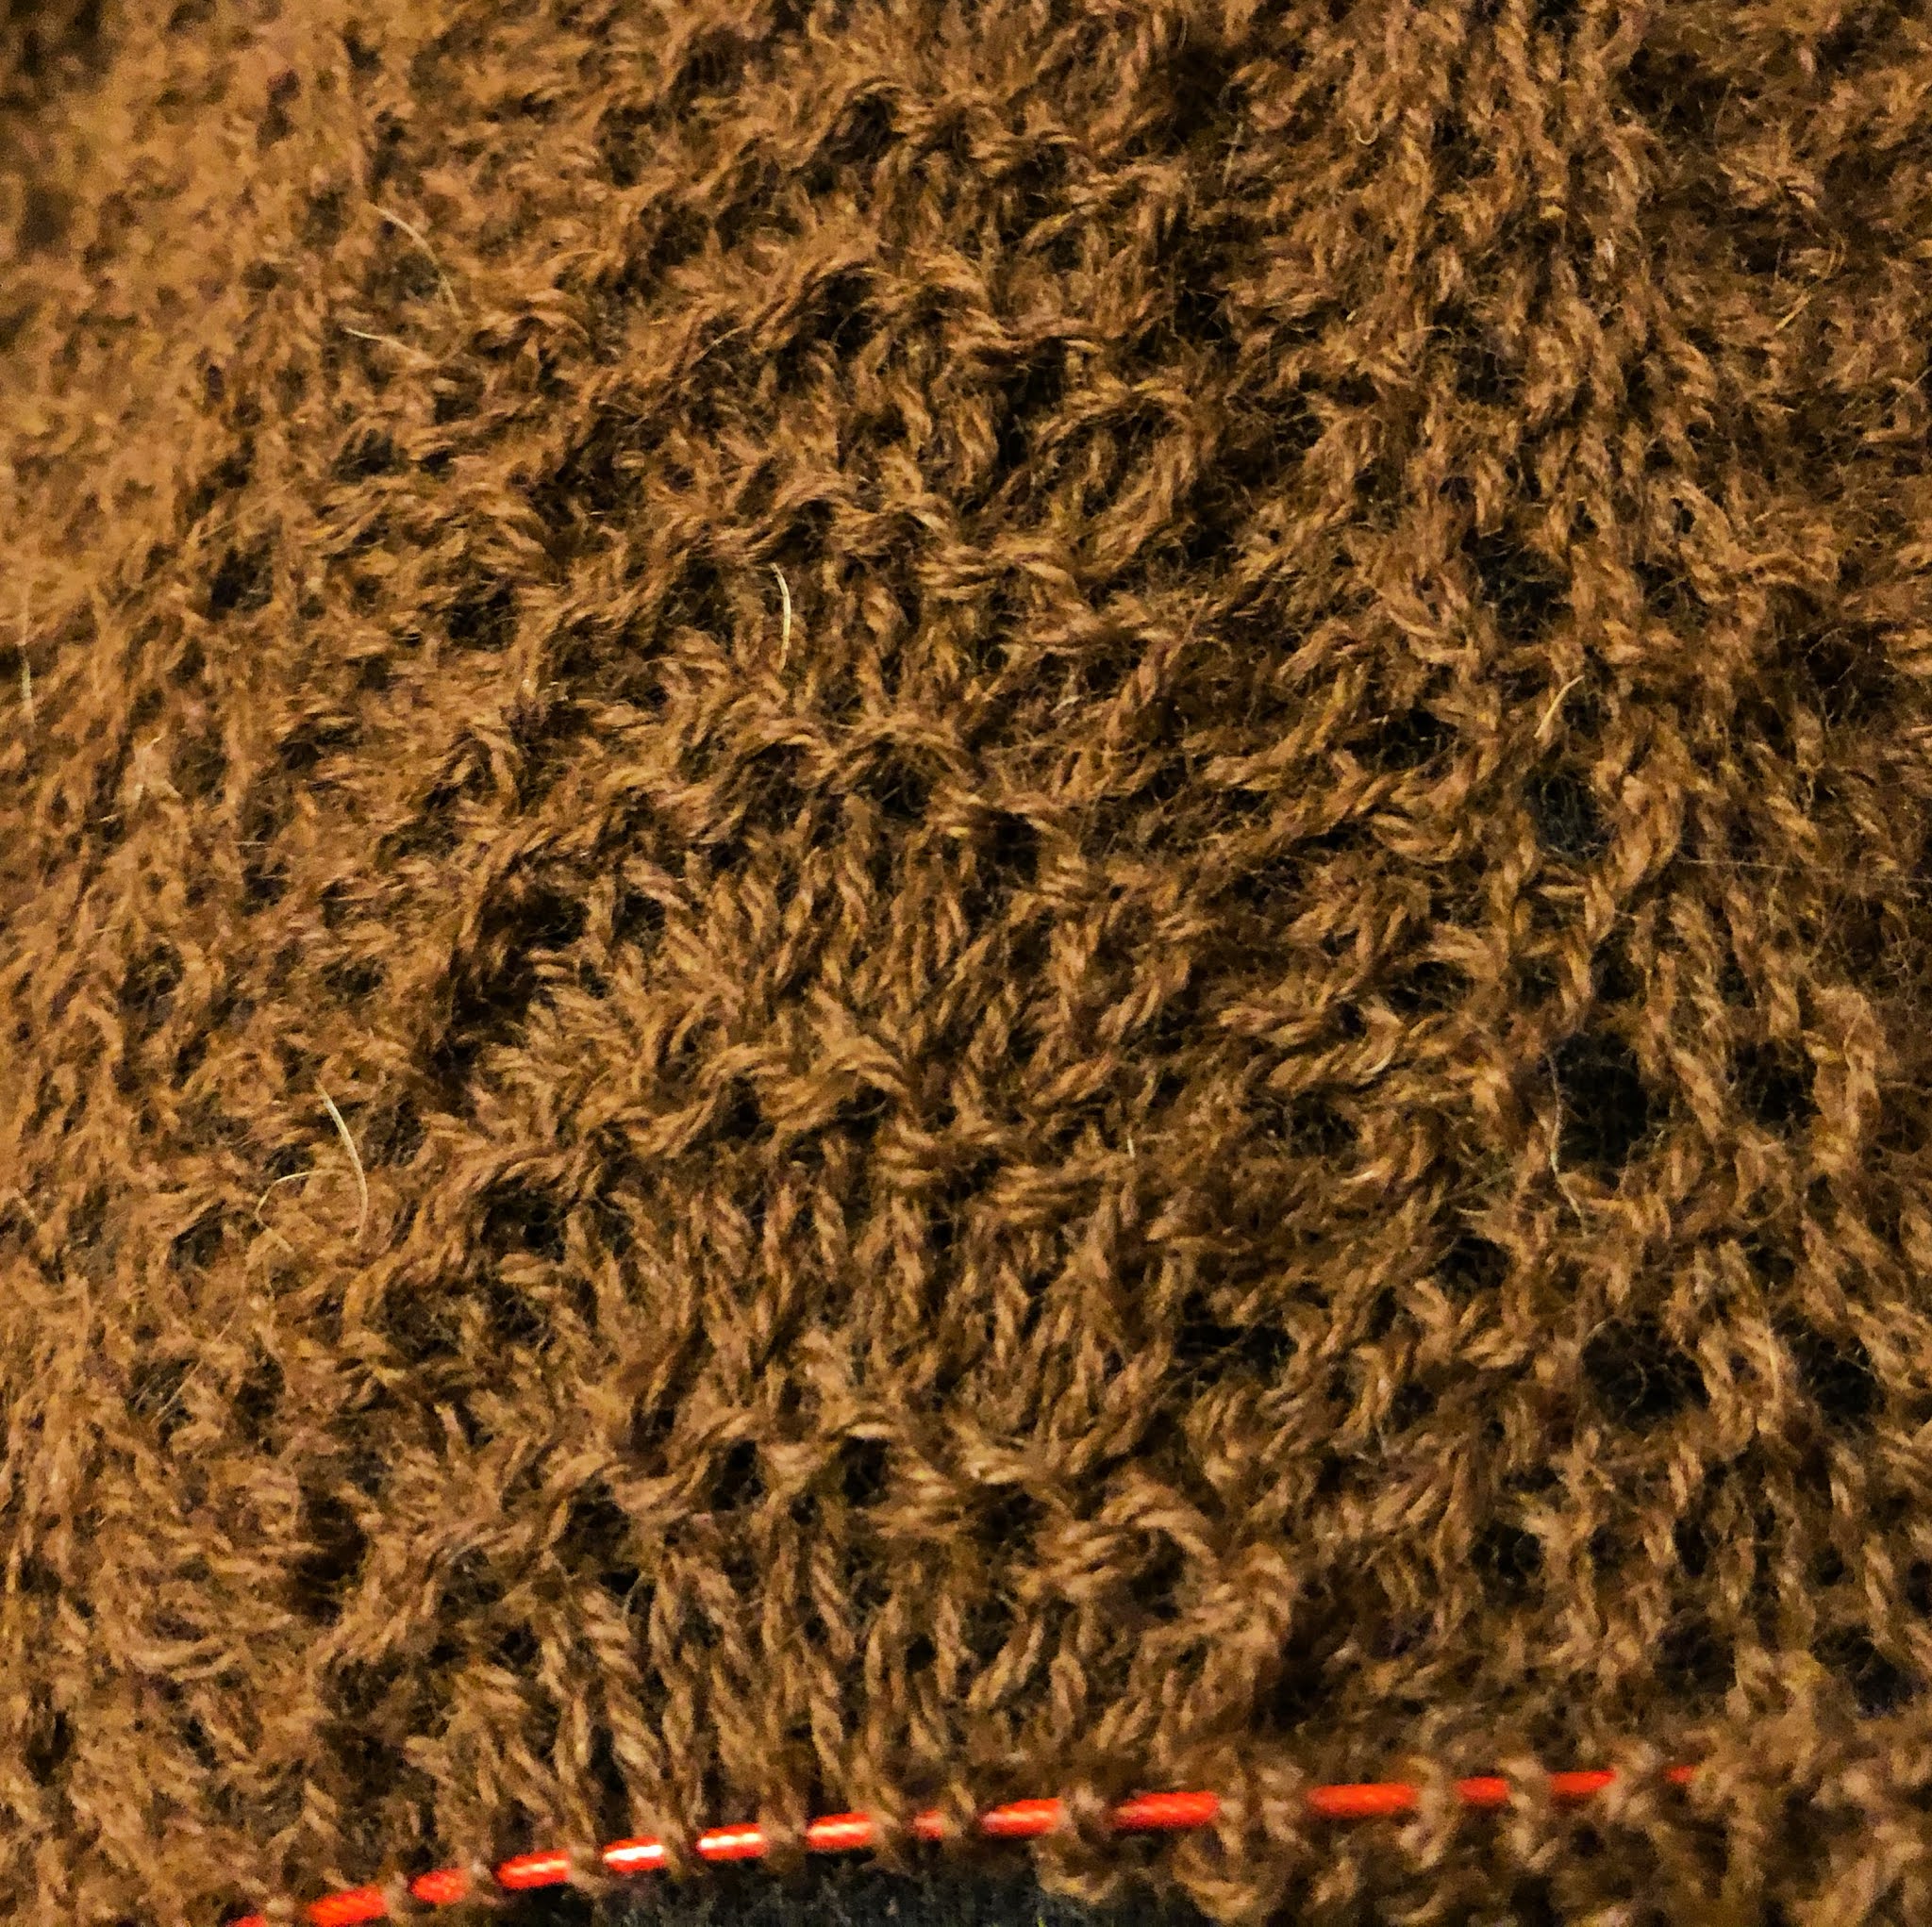
A few weeks ago my workplace had to go into quarantine. It lasted 11 1/2 days, and I tried to get as much done as possible! In addition to reading (I'm still six books behind on my Goodreads book challenge) and knitting (woo woo lace alpaca scarf weather!) I also finished up three special order malas that had been particularly challenging. I love putting together the special orders, gathering beads to match the person, arranging them, and then hand-knotting them with the person in mind. Sometimes it is simple to put together the right combination, and sometimes it takes a lot of time and thinking to get it just right. They are an interesting challenge, and one I hope I can continue working on and perfecting as time goes by.

Matt and I have both been struggling to get out and exercise regularly, but we are hoping to get out and get a nice hike in today.


I hope you all have a safe and happy holiday this week!


Sunday, October 25, 2020

Snowy Weather

 Hello!

It's been a while. My weekends have been full of Japanese homework, knitting, garden cleanup, and flower bed creation. Now the ground is covered in a foot (at least!) of snow, we have a weekend off from homework, and I am between knitting projects as of right this moment!

I pulled out the leather working supplies and started making my leather tags for the knitting - they are pretty cool! But it was a day full of learning lessons about all the little intricacies - how wet should the leather be? How far apart should the stamps be? Should they go the same direction or upside down? Which of my scraps work for the stamping? Should I buy the heat gun so I can burn the suede style leathers since they won't stamp?? There were also lessons learned on how large the holes need to be in the leather so that I can actually get the needle through, (bigger than I expect they should be) and how to keep the label straight on the knitting while I stitch it (lesson still being learned...) But, overall, I'm pleased with the project. It has been years in the making, and finally seeing the labels on my hats and scarves is very satisfying. 


The knitting projects always come in waves for me - I wanted to work on my colorwork mittens, so I have yarn set aside to make about four different pairs. Of course I didn't swatch my new yarn, assuming it would work since it is sport weight, and while the mittens will fit a variety of hands, they look very silly - long and thin. So...now I have to decide how to proceed - do I rework the pattern to fit my yarn or do I find yarn to fit my pattern? I also have two different colorwork patterns that I want to test out, and one is quite a bit smaller than the other - so that raises even more questions. What it really means though, is that I am doing a lot of thinking about knitting and a lot of charting, and a lot of math, but not actually a lot of knitting. 

With the holidays coming up, I have several custom order malas to be working on, so I'll need to get my thoughts and materials gathered for that. Yesterday I worked on my Etsy listings for the jewelry shop, I have jars of jewelry sitting on the coffee table staring at me: earrings and bracelets and necklaces that have yet to be photographed or listed. 

We shoveled three times yesterday and once on Thursday - so we are fully into snow season! Matt and I are hoping to get out in it today, put on our long johns and go enjoy the sunshine and the blinding white snow. Hope you all have a lovely week!

Sunday, June 21, 2020

Happy Father's Day!

Hello everyone, and Happy Father's Day!
It's going to be a pretty quiet day around here I think, at the very least it has started off that way :) I missed posting last week, but the day got away from me, and we hadn't done much of any note for the week. I've been working on starting an Etsy shop for the Jewelry, and that has taken up most of my evening time. 

Creatively, I've been working on bracelets and bookmarks. My bag full of partially crocheted cat toy balls have been staring at me...but I should really wash another fleece for stuffing...so they will just have to stare a little longer. 

I'm still working on my photo transfer project as well. I've uploaded all of our photos into google photos so that I have access to all of our pre-cell phone photos that have just been hanging out on the computer upstairs. Matt and I also never compiled our Japan photo albums, so that is another of my long term goals. There are a few walls in this apartment that could use some Matt and Kirsten photography, so hopefully I find gold in my searches. :)

Jesse Knight on Twitter: "SO I MARRIED AN AXE MURDERER still has ...

Have a wonderful week and a lovely lazy Sunday. :)

Sunday, May 17, 2020

Weekend Scraps

I headed back to work this week, and it feels like I almost got more done than I did on my week off. (Probably inaccurate, but it FELT that way...lol)

Our business started back in 1999ish, when Mom and I started making mice cat toys from our scrap yarn. That has really shaped who I am as a knitter, as I always try to utilize as much of the yarn as possible. It's also one of the reasons why I struggle so hard with pompoms - which seem to waste a ton of yarn to make one good pom. In the last few years I have started crocheting cat toys, which allows me to use even non-felting yarn scraps.


Anyway - all this is to set up the fact that I have been thinking about scrap knitting a lot this week. I even made a post on Twitter about it, how sometimes it works out, sometimes it doesn't, and sometimes the end product turns out even better than I anticipated. Over the last two years I've been making a lot of scarves from Scarfie yarn by Lion Brand, which is a non-felting, easy care yarn. I've been keeping all the little scraps, (and sometimes the big scraps!) left over from those projects in a bag, and this week I pulled out that bag and put together a fringed scarf and a hat.

The hat came out better than I imagined it would, although it is a bit large. The scarf was the fun bit, even if the yarn didn't cooperate the way I wanted it to. (I was doing single rows of thicker yarn throughout, and one of the strands ran out before I got to the end of the row. It turned out ok, but not what I had envisioned.) Usually I leave the fringe long and messy, but this time I wanted a cleaner look, so I YouTube'd some techniques for twisting fringe. I love how it came out :)


I also got some flowers planted this weekend, and am headed out again today with Matt to work in the greenhouse building secondary shelves so there is more room for the baby plants.


Hope you all have a great week and we'll see you next time!

Monday, August 11, 2014

Scarves!

I'll admit I'm not getting a ton of knitting accomplished between vacations, working, and tending to the garden - it seems like we are pickling peppers every other day! But I did get a few scarves knit up this summer. I really love making infinity loops - I'm so glad they are popular these days! Making a moebius is always fun, I never really know how long they will be when they come off the needles, and trying to make patterns in the fabric always has interesting results. If you remember, we first brought up moebius knitting back in December and then showed off some of the scarves in January. I used some funky yarn this summer, hand dyed by Pam, so I kept the patterns pretty simple in this grouping. I also made a super soft and lofty alpaca loop! It is by far my favorite (don't tell the other scarves though!) and I am thinking I may just need one for myself :)

I'm building the listings on Etsy today, and hope to have them up by the end of the month! For now, here's a little preview :)

Black Wool and Purple/White Fluffy Yarn - Made interesting wide stripes!

Hand Dyed Blue and White Wool from Pam, done up in wide bands as well.

Another skein of hand dyed wool from Pam, this time in a loose seed stitch, very bumpy texture!

The alpaca scarf - I did knit and purl ridges here as well, but the texture of this yarn kept them close together. This scarf looks skinny, but it actually stretches quite wide because of the ribs it created.


Monday, July 28, 2014

On the Needles

Yesterday Mom sent over pictures of her many tubs and cones of yarn.

Mom's Bookshelf of cone yarn
She's been reorganizing her yarn again, and it inspired me to work in my yarn closet! We are rearranging our living room, and had an extra book shelf that needed a new home...and it happens to be the perfect width to fit next to the dresser in my yarn closet. What serendipity!

Bookshelf, now yarn shelf!
During my rearranging I found all kinds of yarn that spoke to me, a scarf here, a hat there, and a pile of cat toys. That, I think, is the most wonderful part of cleaning up the yarn room - new inspiration for your knitting!

New Scarf on the Needles


Monday, July 14, 2014

Summer Knitting, Had Me a Blast

Summer, for me, is a time for knitting. Ever since I went back to school nearly two years ago, I haven't been able to find the time to knit in the cooler months - the normal time to make hats, scarves, and mittens out of wool. Sure, I knit on breaks and when I just need an hour of sanity, but the big knitting - the new patterns, rewriting patterns, and learning new techniques of knitting just doesn't happen until the summer rolls around. My big problem with this is that I don't always write things down, and I don't always remember what I was working on last summer! About a week ago I came across a bag full of yarn, needles, and a half finished pair of mittens. They just needed thumbs. They are a pattern that is new to me, but one that Mom has been knitting for a while. In fact, she wrote the pattern out and has been selling them as kits. I believe I made these mittens last spring to test the pattern, and tossed them in a bag with disgust when I realized I didn't like the thumb. This summer, seeing them with new eyes, I saw how I could very easily fix the thumbs already in place, and hopefully make them better in the next cycle.

Last Year's Mittens

When Matt saw them finished he asked if there was a way to adapt the pattern into a hat, and a little naggling at the back of my mind told me that had been an idea last spring too. For now I'm content making a few more pairs of mittens before I write out the hat pattern. And maybe learning how to take better notes for future Kirsten ;)

New Pair in Progress


Tuesday, June 24, 2014

How-Tuesday: Crocheted Cat Toy!

So I'm not really going to teach you how to crochet. Sorry for the misleading title! For starters, I barely know how to crochet, I'm self taught from several books. That's how I know that there are really great resources out there for you if you do want to learn how to crochet. I'm partial to Stitch 'n Bitch Crochet, The Happy Hooker, because she has pretty color images to help you understand all the loops and stitches and stuff.

One thing I do know how to do though, is make a cat toy. For years I have been making ball and string toys, like this:

Lela with a ball and string toy
They are wonderful, and really stand the test of time (I still have the original from 2007, and though the kitties really prefer the new ball and string toys that aren't theirs, they will occasionally bat the old one around too. Catnip spray doesn't hurt either.) but they hurt to make. You see, in order to make a knit ball sturdy enough that a cat can't claw it open in minutes, you have to knit a really thick fabric. Or felt it. Since I make these toys from cotton, felting is out of the question, so knitting a thick fabric becomes the only choice. Unfortunately, knitting a thick fabric that curves into a ball shape isn't really all that easy, and when you already have carpal tunnel, it becomes nearly impossible. I've been exploring different options over that last few years because I don't want to stop making these toys. This summer I finally tried the option I've been avoiding the most: crochet. Crochet is naturally of a thicker and sturdier construction than knitting, perfect for cat toys. I found a great pattern online for a sphere (google it - there's a lady who wrote up patterns for mathematically perfect spheres, pretty sweet) and came up with this:


Now, once I made the ball and string toys I thought, "These would be great just as balls too! And Matt has been badgering me to make a toy that he can use to teach Norman fetch...a smaller version of this is exactly what he's been wanting...." So, I fiddled around a bit more, made some small balls, and a few of these:


But of course, Etsy dashed my hopes of being original. There are at least 14 pages of cat toy balls made of cotton, and stuffed with polyfil and catnip. They range in price from $holy-cow-that's-low-how-are-you-making-a-profit?? to $wow-that's-a-lot-for-one-toy! So, I figured I would need to stand out somehow. Another idea that's been rattling around for a while now is to use natural wool fibers for the stuffing, in place of polyfil. But it's so expensive, why would you use perfectly good roving material for stuffing? Well, if you end up with six huge bags of wool still in the grease, and no way to card it, then you have a perfect stuffing material :)


There you have it my friends, how to make a crocheted cat toy. Mull it over for years, finally make it, then test it until it's ready for sale on Etsy. (We are currently in the testing phase, with hopes to move into the selling phase soon.) Good luck in your endeavors :)

Tuesday, March 18, 2014

How to Be Inspired to Knit

Inspiration for knitting can come from just about anywhere - but Pam is here to share a story of her most recent inspiration!

We were watching a TV show one night and I couldn't keep my eyes off a hat that one of the characters was wearing. It was an Aran ear flap hat! I thought to myself, "I know I have a pattern for something like that!" So I spent some time digging through my binders of patterns and found one. I decided to use some of the yarn that Lindsey spun for me at Kurth Valley Spinning Mills, it was some yarn from my white sheep. It's a great yarn and has some character to it. I thought this should be easy, it starts with casting on just 28 stitches! The problem was that every other row had cables. It had a chart but the chart was very hard to read so I had to use the written instructions. I spent many nights in my recliner working on one or two rows! Last week I thought maybe I should have written a chart that was easier to follow but I only had about 30 more rows to knit! Here it is mid construction. I decided not to add earflaps in the end!


I also find myself paying more attention to what characters are wearing than what they are doing in some TV shows. I also tend to find myself spaced out on campus, intently staring at someone who may be wearing a piece of knitting that I am recreating in my mind. Sometimes I worry that those other students will notice and think I'm a creep, but I think that is just the peril of being a Noticing Nelly Knitter!

Novice Knitters may need an extra push to be inspired to knit, but once you start knitting, it is difficult to stop. You may see someone in the grocery store, at work, or even in the car next to you on the interstate, and think - I wonder if I can knit that? For Novice knitters - don't be intimidated! If you see something cool, file it away, and some day you may just have acquired the skills to make it yourself! 


Or you could be like Matt, who wanted to do intricate designs his second project out of the gate! :) (Matt, while being a very skilled knitter and quick to learn, has since put aside the art. He says if he has to pick between the hobbies that will eventually give him carpal tunnel, he'll stick with video games.) Either way, don't be afraid to try something new. It is only in experimentation that we find our limitations!

Monday, March 3, 2014

Knitting Cat Toys

With the semester in full swing I don't have time to do any really intensive knitting. Every once in a while, usually once a week or less, when I need a break from school work, I will allow myself an hour, or two, (or in some really bad cases up to three!) during which I sit on the couch watching something on Netflix and knitting. Since I don't give myself that much time I usually end up knitting replacement mice (for those that have sold recently on Etsy). This way I don't have to bother finding yarn, and a pattern, and needles etc. for a new project. I just reach over, grab my list of mice that need to be knit, pull out the yarn from the mice yarn bag, and get started. Since each mouse takes 45 minutes to knit, and a few minutes to stitch together, I can usually get one whole mouse done during an hour long program. Here is the fruit of my labors so far this semester:


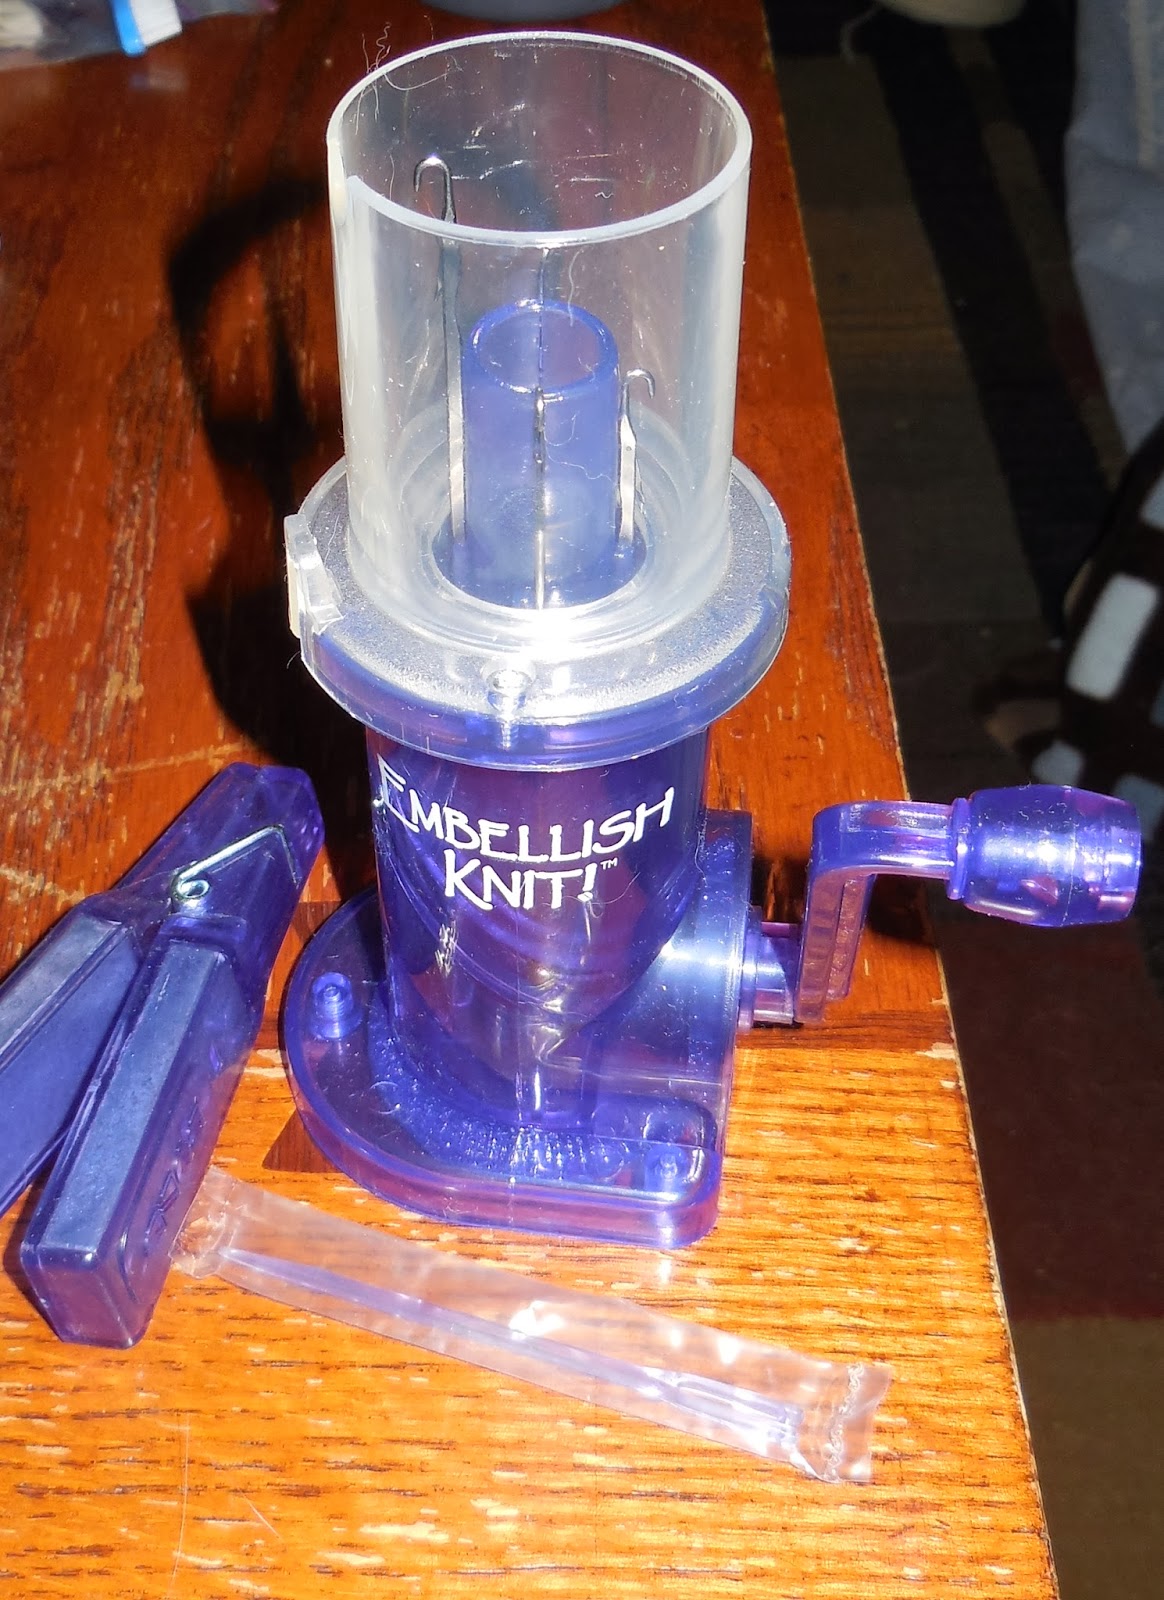
When school gets really tough, I find my mind wandering even more. The last week or so I've been thinking about new cat toys. I need to make more ball and string toys, since we're sold out on Etsy. I even bought a new Embellish Knit to do so. But now I think I might use the Embellish Knit for other toys since the thick cotton yarn will eventually break it. So I now have visions of wool i-cords felted into indestructible toys for the kitties. But what is at the end of that i-cord? That part I haven't figured out yet. I do know that I want to make them interactive toys by looping the i-cord to go around a finger:


Most of our toys aren't interactive, and that makes me feel we are doing a disservice to our customers. Mice are fun for the kitties, but not always for the people! So what do you think you would like to have dangling from the end of your kitty's new i-cord toy? A mouse shape? A fish shape? A ball? Or something completely different? Let me know in the comments!!

Tuesday, February 25, 2014

How to Make an I-Cord

In our knitting, we use i-cords a lot. Every mouse, every snake toy, purse strings, cowl/ponytail hat ties, hat ties...the list goes on and on. They are super handy little buggers, and you can use them for anything imaginable. You can use two double point needles, a circular needle, or even handy dandy little i-cord making tools. It all depends on what you need, what you have, and how you make it. For the mice and snake toys I go 'old school'. I make the mice and snake toys on size 11 double point Brittany needles, I only have two on hand - not sure where the rest of the set is. I start the mice toys at the nose, and end with the i-cord tail. First you need to cast on, or decrease down, to the amount of stitches you are going to use for your i-cord. I always use four, but you can test out different numbers for yourself. Knit across the four stitches as usual:


Then just slide them to the end of your needle, so the first stitch you knit in the last row is now the first stitch you knit in your second row. (The yarn is still attached to the far left stitch, but is pulled across the back so you can knit the far right stitch.)


It's as simple as that. You just keep knitting across the four stitches, never turning the i-cord around. Basically, the yarn comes across the back (you need to keep it fairly tight) and the first and the last stitches come together on the back side.

Sorry for the blurry picture! This is the backside, you can see the purl stitches from the last row, but then how the knit stitches come together below.

For the ball and string toys however, I use the Embellish Knit. I used a different hand held device for a long time, and that worked pretty well too, but the Embellish Knit has a hand crank:


The only trouble with the Embellish Knit is that it doesn't technically do heavy yarns. The cotton I use for my ball and string toys is just a bit heavy - and eventually I will break my Embellish Knit. But - it's better (and faster!) than hand knitting a six foot long i-cord. No matter how fast I can knit, this little crank device can knit a lot faster. I even found a video online that showed a lady who had pulled the crank out, and inserted a drill....then the i-cord knits up really fast!!! :)

What do you use i-cords for? Have you ever made one, or were you intimidated by the lack of turning? Let us know in the comments!


Monday, February 17, 2014

The Evolution of the Dog Toy

Back in 2006 Mom and I came across some nifty german wool that felted down like crazy! We decided it would be perfect for dog toys and knit up a stuffed kitty that we felted down similar to how we knit and felt the mice. It ended up being a bust. The toy took forever to knit and stuff, and didn't stand up as well against doggies as they do against cats. Plus it took so much yarn that no one wanted to pay the price of the toy! It was still a lot of fun, and I would probably make one again!
Next, in 2009, we used scraps of overfelted sweaters (sometimes Mom gets excited and felts a sweater down so that it is too thick to stitch into Recycled Sweater Mittens) and I needle felted them to say fun things. I made the shapes based on what I could cut out of the sweaters and what I thought would be fun to write! My favorite was the Bite Me! Lucy's favorite is fetch! On a side note, Lucy is an adopted dog who was a breeder before she came to Pam and Randy's. Before, she never played with toys...but now look at her! I think it was the fetch toy that really turned her on to toys...but I might be biased. :)

Then, living in Montana with no access (and no money to buy access) to needle felting materials, and an overabundance of scrap denim...I made the denim Bite Me! toys. They are good for non-chewer dogs who love a good squeak toy, but since I can't guarantee them against tough teeth, I have yet to sell them on the internet. I still have them at my craft show booths though, and people seem to dig them!


Maybe someday I'll have the next generation of dog toys to show you (and sell you!) but until then, I'll keep playing with the cat toys!

Tuesday, February 11, 2014

How to Pick Out a Knitting Project

We use a lot of methods to pick out knitting projects, but usually we have a ton of ideas already in the back of our minds - things we've seen online, in magazines, on tv, or innovations to make something better that we are already making. Pam is here to tell a quick story about project selections!


We decided last minute to go to a jazz concert in Eau Claire on a Saturday afternoon a few weeks ago, and I thought - what should I knit while I'm listening to some great music? I didn't have a current project that would be a good fit (everything I was working on required thought and closely following a pattern) so I decided I would start on a new project that I'd been playing around with in my mind! I decided to start a moebius that was checkerboard. Kirsten and I had actually been thinking along the same lines, and the week before we had chatted about the logistics of a moebius checkerboard. So I quick cast on (no really, if you haven't made a moebius yet, you should try - the cast on is so quick!) about 130 stitches and started to knit on the 45 minute drive to Eau Claire.  


The music was great and I had my knitting to keep my hands occupied. I kind of wished I was in the last stages of an afghan because it was chilly at the concert! Anyway, I spent the evening knitting and I wasn't really happy with the way the checkerboard knit out, but it was interesting, and worth the experimentation. Then inspiration hit again, and I thought maybe I should put a white stripe on the edge of the scarf. I had initially planned on making the whole edge of the scarf in white, but I ran out of the white yarn (yes, I used up some stash!). So I did another stripe of red and then I remembered that I had read about someone putting a ruffle on the edge of a moebius scarf.  So I found more white yarn and I did two rounds - Knit one and then a yarn over! So, I ended up with a lot of stitches. I knit a couple of rounds without increasing anymore and then I cast off using an i-cord cast off. If you haven't done an i-cord cast off - you cast on three stitches and then you knit two stitches, knit two together and then slide them back to the left hand needle. In other words for every three stitches you knit you get rid of one! I didn't think I would ever get the beast cast off! I don't know what I'm going to do with it, but I think I might wear it for the Community Band Concert in December! We always need to accessorize for the holidays! Hmm...maybe I could use it for a tree skirt under the tree!


Mom mentioned that I had also been planning a checkerboard pattern. I did end up making one - I had a small ball of yarn I was trying to get away from Lela, and ended up setting it on top of another skein of yarn. Together they looked like a cute little pumpkin, and I thought I should definitely knit them together. So my checkerboard scarf started with a thin round of non-checkerboard Gray, then I started the checkerboard. I was pleased with my results, but I think next time I'm going to do a solid color scarf and start the checkerboard immediately. 


Picking out a knitting project really requires knowing how much time you will have, and how much attention you can pay to that project. Of course, my projects usually morph into other things as I go along and the inspiration hits me! Sometimes it works out and sometimes it doesn't, but I learn something new almost every time!

Monday, January 20, 2014

Yarn Porn - KnitPicks Cadena

Welcome back to the third installment of yarn porn! If you follow our blog, you already know we love yarn (check out installments one and two!) so today I'm here to share another yarn we have found really enjoyable to work with! KnitPicks Cadena!

This is a yarn Pam purchased and sent to Kirsten so that she could learn how to make Moebius scarves. (She also sent a few sets of the Harmony Interchangeable needles, which are pretty nifty!!) It is a heavy weight yarn with a beautiful sheen. The label says it is 70% Peruvian Highland Wool, and 30% Superfine Alpaca. Superfine indeed! The heavy yarn shows great stitch definition, worked well on needles 9-15, and knit up beautifully! It even grafted together well with the spit and rub method (if you are unfamiliar with this method, when you reach the end of a skein and need to add more, you simply splay the plies apart, then lay them next to the new skeins splayed plies, get them wet with saliva, then rub vigorously against your jeans. It essentially felts the yarn in that small area, fusing the two ends together into one continuous strand!).

Here are some of the Moebius we made with the Kestrel and Currant colors.

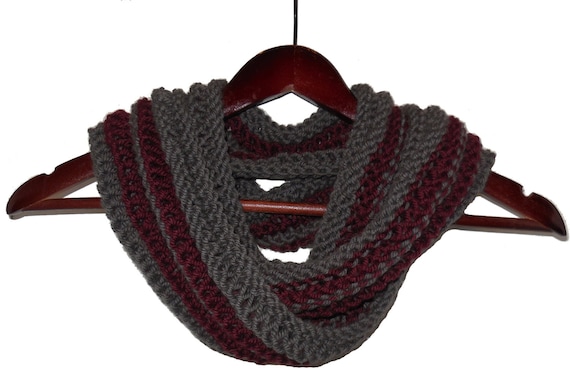
Red and Gray Infinity Loop Wool and Alpaca Scarf - Warm Hand Knit Moebius
Gray and Red Infinity Loop size 11 needles, drop stitch


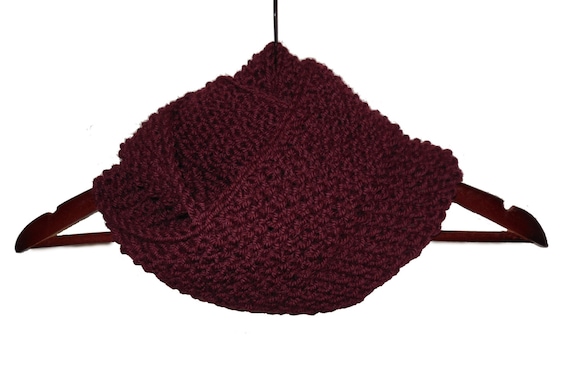
Red Infinity Loop Wool and Alpaca Cowl Scarf - Warm Hand Knit Seed Stitch Moebius
Red Textured Moebius size 15 needles, seed stitch


Check out their other yarns (and goodies!) in their online catalog!

Tuesday, January 14, 2014

Two for Tuesday - Knitting Needle Organization

It's Pam and Kirsten, back again to talk about organization. Last August we started the conversation about how to keep things organized with your yarn stash. Today we're back to talk about how each of us stores our needles!

My needles have always been a mess, languishing in bags with UFOs, or stuffed into another bag all jumbled and mixed together with other knitting notions and crochet hooks. So last fall when all of the dorm room organization stuff came in I found myself a great little shoe rack and brought it home for my needles! I'm a little short, so the top rows aren't as useful as they would be to someone taller than me, but I have more than enough room for all of my circulars, dpns, and the tips for my new Harmony Interchangeable nedles from Knitpicks! I'm a little weird, and like to keep the original packaging for all of my needles, so it makes it even easier to keep them organized. The little baggies my Addi's are in are labeled with their cable length already, and the Crystal Palace bamboo dpns are also labeled with their length! Pretty handy for me! There's still plenty of room for when I buy all those sock needles I've been meaning to pick up....


This hangs on the backside of the door in our second bedroom, which is almost always open. This way they are out of sight, but also really easy to get to, I just have to swing the door shut!

I do mine a little differently. I like to keep my needles mobile! I put all of my needles in a bag by size. The bags are labelled with the size:

 I have bags for every size needle I own:
 And they all fit nicely into this zippered pouch! Along with a needle sizer, just in case they get mixed up!

This way, they are all together, they are easy to find, and I can carry them with me in case I have a needle emergency!

How about you? How do you organize? Or don't you? :)